Purpose
The purpose of this experiment is to determine your vehicle’s drag coefficient Cd and coefficient of rolling resistance Crr. This is done by measuring your vehicle’s speed as a function of time while coasting in neutral (also known as a coast down test).
Why would you want to know Cd and Crr for your vehicle? Well, suppose you’re interested in modifying your vehicle for improved fuel efficiency. You might consider modifications such as air dams, wheel skirts, removing mirrors, switching to low rolling resistance tires, etc. Cd and Crr offer a quantitative method of comparing vehicle performance before and after these types of modifications to see if you made any improvement.
Equipment
You will need the following equipment:
- a vehicle (and someone with a driver’s license)
- a clock or stopwatch
- a pen and paper (and someone other than the driver to record data)
- a flashlight (driving at night avoids traffic)
- a long stretch of flat road with little traffic or wind
- Excel or another spreadsheet application. I prefer OpenOffice Calc which you can download and use for free, but its Solver function does not handle non-linear systems (yet) so you’ll have adjust input variables manually by an iterative process to minimize the error between the model curve and your data (it’s not too hard, I promise).
- The spreadsheet I created to analyze the results. You can download it here: Drag_Coefficient.xls

Background Information
First, let’s define some quantities:
Fd is the force on the vehicle due to air resistance (drag) in Newtons
Frr is the force on the vehicle due to rolling resistance in Newtons
F is the total force on the vehicle in Newtons
V is the vehicle’s velocity in m/s
a is the vehicle’s acceleration in m/s2
A is vehicle frontal area in m2
M is vehicle mass including occupants in kg
rho is the density of air which is 1.22 kg/m3 at sea level
g is the gravitational acceleration constant which is 9.81 m/s2
Cd is the vehicle’s drag coefficient we want to determine
Crr is the vehicle’s coefficient of rolling resistance we want to determine
Now for some formulas:
Fd = -Cd*A*0.5*rho*V2 (formula for force due to air resistance or drag)
Frr = -Crr*M*g (formula for force due to rolling resistance)
F = Fd + Frr (total force is the sum of Fd and Frr)
F = M*a (Newton’s second law)
Note that both Fd and Frr are negative indicating that these forces act opposite to the direction of the velocity. Note also that Fd is increases as the square of velocity. This is why driving at high speeds is much less efficient than driving at low speeds. Combining these formulas with a bit of algebra gives us the acceleration due to air and wind resistance as a function of velocity:
a = -(Cd*A*0.5*rho*V2)/M – Crr*g
Note that the acceleration is negative indicating that air and wind resistance will cause the velocity to decrease.
I created my spreadsheet (see Equipment section above for download) based on these formulas to generate a model of velocity vs time that can be compared to actual data. The model values for Cd and Crr can thus be adjusted until the model matches the data. This adjustment can be done manually, by overwriting the values of Cd and Crr with new values till the model matches the data, or it can be done using a “Solver” function.
Procedure
You can determine Cd and Crr from the same set of test data by measuring velocity with respect to time as your vehicle coasts in neutral. Note that Crr will not be pure rolling resistance but will include some drive-train resistance as well.
1. Drive to a flat road with little traffic or wind.
2. Have the passenger ready with stopwatch and paper to record data.
3. Have the driver accelerate up to above 70 km/h or so, and shift into neutral.
4. Record data as follows. The driver should indicate when the speed drops to exactly 70 km/h. At this time (t=0) the passenger should start the clock. The passenger should indicate every 10 seconds after that and the driver should call out the current speed to the nearest whole km. The passenger should record this value next to each time.
Aside: If you have a digital camera capable of recording several minutes of low resolution video (as most people seem to have these days), the process is much easier and more accurate. You don’t need any equipment except the digital camera. Simply have your passenger record a video of your speedometer during the coast down tests, or find some way of mounting the camera so you can do the recording without an assistant. Using a free program such as Avidemux (http://fixounet.free.fr/avidemux/) you can play the video back on your computer frame by frame and view the speeds at desired times.
5. Repeat the test in the opposite direction.
6. Repeat the test in both directions twice more (6 trials in all, 3 in each direction). All these values will be averaged for a more accurate analysis.
7. Download the spreadsheet I created (see Equipment section above) and enter all your data following the instructions included. The spreadsheet averages data from all 6 trials to create a single data set representing velocity (V actual) as a function of time. It then generates it’s own model for velocity (V model) based on entered constants and initial guesses for Cd and Crr. Excel’s “Solver” function can be used to adjust Cd and Crr in order to minimize the error between the model and actual data. If you are using OpenOffice Calc (which I highly recommend and which you can download for free from http://www.openoffice.org ), unfortunately, the solver function currently only handles linear systems, so you will have to adjust the input values manually to minimize the error between the model and the data. Once the error is minimized and the model data matches the actual data as best it can, then Cd and Crr are correct.
Results
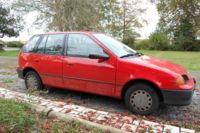
Here are the quantities I measured for my car (a 1992 Geo Metro):
M = 1000 kg (about 850kg curb weight plus 150 kg of occupants)
A = 2.3 m2 (a reasonable approximation based on measurements of my car)
A plot of velocity vs time is shown below. It is based on the averages from my 6 trials. You can see that the model curve closely matches the data points.

The values of Cd and Crr for the model are:
Cd = 0.370
Crr = 0.0106
Therefore, these are the drag coefficient and coefficient of rolling resistance calculated for my car.
These values are nice to know. However, in practice, if you want to compare performance before and after making modifications to your car, you can get faster results just by measuring the time to decelerate from speed A to speed B. Pick high to medium speeds if your modifications are likely to affect drag. Pick medium to low speeds if your modifications are likely to affect rolling resistance. Don’t forget to take multiple measurements in each direction and average the results.
For more experiments you can do on your car see my website IWillTry.org .
Update 2009-01-02
I’ve learned a lot since originally posting this 16 months ago. I’ve played with measuring Cd and Crr under different conditions on a number of vehicles and other experimenters have picked apart and tweaked my spreadsheet for their own uses.
My experience is that there IS a mistake in one of the underlying assumptions of the model: namely that the force of rolling resistance is constant independent of V. Vehicles are designed with negative lift (so they get pushed into the road more at higher speeds, improving handling) so the force of rolling resistance also has a component that varies with V like the drag force. The force of rolling resistance also includes a small component of viscous force (drivetrain) which varies with V.
The model assumes that the drag force is related only to V2 and that the force of rolling and drivetrain resistance is constant. In reality the force of rolling and drivetrain resistance is also related to V2 and V. So a better model of the force on a moving vehicle is:
F = iV2 + jV + k where i, j, and k are constants.
A curve based on that model more closely matches actual coast down data indicating it is a more accurate model. But after solving for i, j and k, there is no way to extract meaningful values of Cd and Crr since by definition, they assume i is related only to drag, and j is 0, neither of which is entirely true. To think of it another way, Cd and Crr values define a model which is only an approximation of the real world. A physical object doesn’t really have a drag coefficient. Only the model of the physical object does.
As mentioned above, if you want to compare performance of a vehicle before and after making mods, the difference in coast down time itself is more meaningful than the change in Cd or Crr extracted from coast down data.
Update 2012-03-06
One reader, Frank Bernett, has used the above techniques to determine drag and rolling resistance as a function of velocity for his MG Midget electric vehicle. He has gone a step further and also used GPS data from his drive to work to build a simulation of sorts to test how vehicle modifications (reduced mass, rolling resistance, and drag) will affect energy consumption for his particular commute. Very clever. Check it out.
This article was originally posted on another site. Here are the original comments.
Justin said … 14:04, 5 May 2009 (PDT)
Is there a way to figure out the drag coefficient of car without driving it ?
Rob said … 15:39, 5 May 2009 (PDT)
Yes. Put it in a wind tunnel and measure the force as a function of wind speed. But if you don’t have a wind tunnel you have to drive it.
Dave said … 12:27, 20 January 2010 (PST)
Thanks for posting this. Do you know if there is an official standard such as from SAE or ISO for conducting this type of vehicle coastdown rolling resistance test?
Ari Giller said … 13:10, 24 February 2010 (PST)
Yes! Check out SAE J2263 “Road Load Measurement Using Onboard Anemometry and Coastdown Techniques.” There is another good pdf on the external links sections of the “rolling resistance” wiki page.
SATYAJIT said … 21:49, 28 April 2010 (PDT)
very well explained.. and thanks for this article..
Giant said … 19:45, 3 May 2010 (PDT)
Rob, unless you have a really nice Wind tunnel, you will not have a moving ground or boundary layer suction devices. The Wheels rotating changes everything. We are testing our race car in CFD->Wind Tunnel->Coastdown tests to get an accurate Cd.
Hi Rob,
An old friend of about 60 years gave me the link to this site as he is interested in home heating efficiency. Well, aren’t we all, and I intend to explore more. However, what sparked my interest was the above article, as I too have done coast down trials a few years back with my Volvo 740, and made up a spreadsheet to model the experiment. The intent then was to estimate the actual HP to keep the car at 60 mph and relating it to the fuel consumption. This was prompted by a discussion in the local paper about the discrepancy between reader’s observed “mileage” and the government or manufacturer’s stated figures. The first thing to be pointed out was the importance of checking odometer accuracy by running measured distances (ditto for the speedometer if coast down trials are to be done. My calcs were based on coasting down from 101 to 92 km/h, so 96.5 is about 60 mph. The time was roughly 6 sec, and my result for HP was about 22 while the fuel consumption was 30 mi/U.S.gal, and energy efficiency about 23%. This output seemed to be in the ball park, based on technical material previously read. The point was to show how important it is to lower fuel consumption when abour 75% of it is lost through exhaust, engine block and radiator.
Well, I like your XL sheet better than mine, and should be able to plug in the data and equations for power and fuel efficiency. Have also read the discussion that ensued on the “instructables” website about the pros & cons of tire inflation. Have done some engineering courses, worked in engineering offices for 47 years and done mechanical programs in Fortran, Basic, Excel and TI-59 calculator. BTW, call me old fashioned, but I prefer to work in the ft-lb system, so I converted your entire sheet to fps. Something got me thinking about another force in the system, i.e., the angular momentum of the wheels at speed. Intuitively, this would seem to act against the air and rolling drag. Tried to develop an equation and at best could just model it as a difference in kinetic energy. When this is plugged in, your Cd comes closer to 0.4. Also might mention that the Cd is really an abstract concept, as it seems to be comparing the real world to pushing a volume(mass)of air by a frontal area (frictionless) piston through a tunnel at speed. Also have seen a site where one can find Cd and Crr by choosing typical parts of the car body and tire characteristics.
In summing up, I would not inflate my tires to more than 35 psi, as my Volvo’s stiff suspension combined with choppy Montreal streets make for a harsh enough ride. For sure, underinflation is bad for wear, handling, acceleration and braking. As you say, all that is really required is to check the coast down time for any improvement. However, for intellectual/scientic curiosity, the model spreadsheet is a stimulating fun exercise. BTW, seem to remember on some website an account of a Geo Metro outrunning a police car, which crashed during the chase – LOL.
1996 Metro hatchbacks are reported to have Cd of 0.34 at this link.
http://ecomodder.com/wiki/index.php/Vehicle_Coefficient_of_Drag_List
If you put headlight covers on, you should be pretty much the same. Your only disadvantage might be a steeper drop off at the back end. As it is, your car should be about 0.35 if the true Cd for a 1996 is 0.34.
Converting coast time to Cd, I have a suggestion. Instead of using a spreadsheet, why not rent new cars made by a manufacturer who are honest about Cd, and find the one with the same drift down time. Then look up it’s Cd and you have it. To be fair, you may need to temporarily use tire widths that match the rental car tire widths (rolling resistance should be close).
There’s a wind tunnel in the Southeast US that charges about $800 for thorough testing of a vehicle. That would be my first choice…because renting cars, and buying skinny tires to use 1 day is going to cost you.
Your coast down time is a legit test for evaluating changes on the same car. I don’t think it would work well comparing two different cars. You’re relying on the speedometer calibration being the same in two cars, which is unrealistic. Why not do steady-80 mph-to-0 mph coast time, with the intial, steadt 80 mph displayed by gps? We probably agree that a GPS unit, often delayed by 1000 milliseconds per update, might not show mph quickly enough to be accurate in your drift down test.
From about 1967 to 1976 I believe some magazines plotted drift down times. You could use those to compare to your car. It’s really a shame drift down speed was reported so scarcely.
Hi Scott,
Renting cars and comparing drift down times doesn’t sound easier than a spreadsheet to me ;-). Nor does the wind tunnel. Especially if I want to test frequently after making mods. Drift down time also depends on much more than just Cd. The mass, frontal area, rolling resistance, etc would all need to be the same to assume that same drift down time = same Cd. Rolling resistance depends on more than tire width. I wouldn’t assume similar widths have similar rolling resistance.
I once did a test measuring rolling resistance on my car just by pulling it on flat ground with a digital scale. I tested at different tire pressures and found Crr varied quite linearly from 0.0114 at 20 PSI down to 0.0067 at 60 PSI (rated tire pressure was 32 PSI). Have been meaning to post that experiment here. I’m not suggesting anyone inflate their tires to twice the rated PSI, but it certainly does make a significant difference to rolling resistance (and thus fuel economy). Also, having tried it briefly, it makes for quite an uncomfortable ride.
I agree Speedo accuracy is an issue if comparing different vehicles. Speedos should be pretty linear but can be off by a constant factor depending on things like tire wear or variation in tire diameter between different brands. Best solution is to calibrate the speedo against a GPS before testing. Drive at constant speed of 100 kph by the speedo and see what your GPS says you are actually doing. GPS delay has little effect if you are holding constant speed. Say your GPS says you’re going 105 kph. Then just multiply all speedo reedings by 1.05 to get true speed.
For even more accurate speed measurement, most vehicles have a VSS (vehicle speed sensor) that is used for the speedo and anti-lock brake systems. With a bit of simple electronics (arduino, raspberry pi, even just plugging into the stereo input of a laptop, or using some kind of oscilloscope app on your phone) and programming you can log the pulses and calculate a very accurate speed (but you still need to calibrate to GPS).
For vehicles with OBDII (alas my Geo Metro predated this standard) you can now buy simple adapters with bluetooth connection so you can log data including vehicle speed directly on your smartphone (but you still need to calibrate to GPS).
Cheers.